Soulbound

One of the exciting projects I’ve worked on at school was Soulbound. The alpha version of the game was made between October the 14th 2013 and Januari the 30th 2014 for PC, Mac and Linux. You can still download and play the alpha version!

Soulbound is a action-adventure game that mixes elements of Diablo and Pokemon. In this game you play as the Beast Master and explore sprawling dungeons. But the Beast Master is not strong enough to withstand the monsters that lurk in the dark. Instead you need to tame these monsters and let them fight for you.

You start of with a few monsters that’ll accompany you in you journey. They have two abilities, one normal attack and a special ability. The monsters you defeat can be added to your team or you can use them to heal the Beast Master. If the Beast Master dies, the game ends. The goal is to make it to the end of the dungeon where a boss battle awaits you.

Game characters

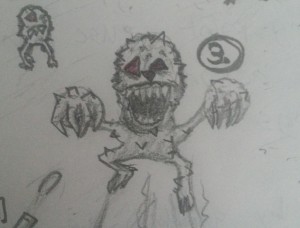
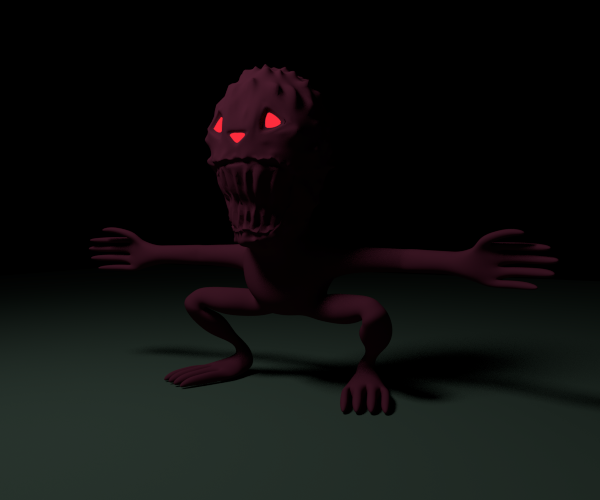
My main role in the project was working on part of the 3D models for the game – such as characters and level assets. This also included the rigging and animation of these characters. The characters were all based on drawings that were made by the lead artist in our team. We were on a tight schedule so the characters were pretty low poly. But in total we managed to make five playable characters that had all a similar style.

This is the character I am most proud of and was the last character I made for the game. The skeleton character had a retractable bow and a special animation where it exploded in various pieces. Also, if you have this character in your team, it plays its bow like a violin. Here’s the animation for the special attack of the skeleton character.

Skelly special

The golem was the second character made during the project. It was the biggest and also the slowest character in the game.

The first character created was off course the Beast Master. The first version of this character had a whip used for taming the monsters. But because of some difficulties this got removed in following versions.


Opening Scene

Part of the teaser, which you can see in the last part of the following video, was also made by me. The video was also used in the trailer and as the opening scene for the game.

Further development

Although there were further plans to continue development after the alpha state, the team fell apart in an attempt to create a new version of Soulbound. This happened a while after the announcement of the game being greenlit on steam. There’s still some cool artwork up on the Facebook page. I guess, for now, the project is put on hold.

I think we got some nice coverage on the game. Here are some links on the coverage we got.

I’d like to thank everyone involved for an amazing experience:

  • Selmir Aljic
  • Ralph Amian
  • Bjorn Buchner
  • Mark Dijkema
  • Gilles van Kralingen
  • Oswin Kroon
  • Yu Li
  • Peter van der Lugt
  • Bart van den Oord
  • Jonathan van Putten
  • Robert Tangerman
  • John van de Water
  • Guido de Wolf
  • Frank Wypchol

And thanks to everyone who tested and played the game.

Tiny Bear Adventure

Had fun making this little game past weekend. It was made during the 31st Ludum Dare with the theme “Entire Game on One Screen”. At first I tried making something else. But with no clear direction, halfway through, I got what I thought was a better idea – Tiny Bear Adventure. Basically, in this game, you just place tiles on the playing field and see how this bear with a sword and a shield moves to a random tile. It’s very random, yeah, but with a little more work, I actually see some potential in this silly little game. So I’ve decided I will try and work on this in the weekends to come.

Play Tiny Bear Adventure!.

tinybearadventure

Posted on in Games | Tagged

Last Mum Standing

This is Last Mum Standing, a game I made for the annual, third gameboy jam, which was held from the 1st to the 10th of August. It’s not really what I wanted it to be. I had some trouble with figuring out HaxePunk. But I managed to make a neat little game within the time limit.

In conjunction with HaxePunk, I used GraphicsGale for graphics and animations. Sounds were made with Korg DS-10 for Nintendo DS.

Play it on Game Jolt!

teaser_x3

Posted on in Games | Tagged

DIY Steam Controller

It started off as yet another elective course, where I had to prototype a smart object using the equipment of my school’s fab lab (site is Dutch). But it rapidly got out of hand as I got excited about my idea. So I decided to write a post about the adventure.

The idea included a game controller using capacitive touch sensors as its only input. The smart thing about it, is that it is able to sense whether your holding the controller or not. I got the idea for the capacitive sensors from a video I stumbled upon, demonstrating a capacitive sensing library for Arduino. Because I’m into games, making a game controller out of these sensors was a small step in the thought process. After a week or so, I came with the idea of using a more sensitive sensor which would be used to check if the controller is being held. I thought this might be useful in pausing and unpausing a game. This means that when you pick up the controller you’ll resume the game and when you lay down the controller (or accidentally drop it), the game will pause. Meanwhile I started working on the design of the controller. It took me three revisions to come to the following result.

The Design

The first version of the design had some sharp handles sticking out. But I decided to cut these off in the 3D model, to cut on the costs of printing. So I came to a second version. I was then advised to cut the body into smaller parts, because the DIY 3D printers tend to have issues once in a while. That’s why I separated the body in to two halves. Also, I added a little bump to each touch pad, so the player could feel where the centre of the pad is. This became the final design.

The main versions for the design

The design for the controller is inspired by the Steam Controller and a bit by the SNES controller. It consists of six parts. From top to bottom you have the cover (1), two touch pads (2), the upper half of the body (3), the lower half of the body (4) and a slide cover (5) to secure the Arduino inside the housing (see image below).

I tried 3D printing all parts using the available 3D printers. I started with the smaller parts so I could practise a bit on printing and find the best printer configuration. When I was familiar with printing the small parts, I started printing the upper half and lower half of the body. The filling of the inside of these parts were set too high. So they took around four to five hours each to complete. The touch pads were the most important parts of the prototype, so I decided to print them once more with a better printer configuration. Because the printing material couldn’t be switched easily for a different coloured one, the touch pads became orange and the body black. I must say, I’m quite happy with the colours as they are now. But the printed parts didn’t fit too well. I had to cut away some of the material to make everything fit. Also, I had a lot of waste, because of all the support that was printed.

3d printing some parts


Technical Design

To make the controller work, I started experimenting with the touch sensors using the capacitive sensing library. First I did a test where I turned on a LED by touching a piece of aluminium foil. For this experiment I used the example code from the web page of the library to measure whether the foil was touched. The next thing I did, was experimenting with different placements and shapes of aluminium foil for creating the final touch pads. According to the tests, individual placed sensors would be the easiest choice and would give the best results.

Experimenting with making touch sensors

After these tests I started building the sensors. Soon, I discovered aluminium foil wasn’t very nice to work with. Soldering the aluminium foil left burn marks on the foil and it wrinkled easily. So I decided to get myself some proper material – copper foil. Copper foil is stronger (depending on the thickness), thus easier to work with, and  it conducts around 40% more then aluminium foil. After I got the copper foil, I started making the long distance sensor, which was easier to make then the other touch sensors. This sensor was then stuck on to the back of the slide cover with insulating tape. Although… the slide cover wasn’t sliding any more. Instead, I had drilled a hole in the cover. There was no other choice, because of all the cables underneath the cover, coming out of the Arduino. And the body didn’t have the correct measurements to fit the slide cover.

Made a sensor using copper foil

Cables with hooks as connectors

The following two things on the list were the actual touch pads. Basically, each touch pad was a set of cables and resistors mingled together, with at each end of a red wire a piece of copper foil. After the soldering, there was some glueing to be done. I super glued a bright, white LED to each of the printed parts, followed by the copper sensor ends.

Soldering and glueing the touch pads

Once the touch pads were completed, I placed them in the housing. This was the most tricky part, because the cables had to go through small holes and needed to be bent in a way it could fit in the housing.

Assemble and testing

I connected all the cables and tested it. When testing the LEDs, I discovered that you could easily change the intensity of a LED. So, besides that the LEDs make the whole thing more fancy, I added some lines of code to let them give the user feedback of the user’s actions. Using a arbitrary scale, the table below shows how the LEDs give the user the proper feedback.

Action

Brightness LED left

Brightness LED right

Controller is connected to a device (pc)

1

1

User holds the controller

2

2

Button on the left touch pad is being touched and the user is holding the controller

3

2

Button on the right touch pad is being touched and the user is holding the controller

2

3


Demo time!

Here’s a video demonstrating the prototype so far.


The next steps

As shown in the video, not all the sensors work perfectly. To make all the sensors work, I might have to experiment with using a ground plane beneath the sensors. Also, when connected, the Arduino isn’t seen by the PC as a proper joystick yet. But I found some resources on the web, showing me how to do this. Unfortunately, I don’t have the time and resources to make this happen right now. Perhaps in the near future – I’m not sure. But you don’t have to wait for me to start tinkering yourself. If you’re interested in any way, you can download the 3D model and modify the code as you wish. If you’re planning on using my work, an attribution is appreciated. Also, feel free to comment on this post.


Creative Commons License
Capacitive Touch Game Controller (files) by Dylan Dophemont is licensed under a Creative Commons Attribution 4.0 International License.


Low Poly Cauldron

Started making this cauldron a while ago. I gave it a new hand painted texture.

And here’s the timelapse.

Posted on in 3D Assets | Tagged

My Summer Vacation

This summer vacation I wanted to check a few things of my to do list.
First of all, I wanted to set up this website (which I planned to do ages ago). Basically I created a WordPress theme with a bit of basic HTML, CSS and JavaScript. I also used Foundation to create a good user experience on both the desktop and mobile devices.

dimwars_0.3

DimWars for the 7DRTS

The next thing on my to do list was participating in a game making challenge/competition. So, first there was the 7DRTS, which didn’t go very well. After a few days I gave up on the challenge because in order to create my game I would have to start from scratch again. So I ended up with half a prototype.

After this there was the 7DFPS, in which I didn’t participate because I had not prepared well enough. Instead I experimented with the Blender game engine in making an FPS. For this shooter I had a silly idea to create a game that was centered around a group of monkey’s that had gone crazy and would shoot each other with banana’s. I still think this would have been a fun idea for a game. Maybe for a next 7DFPS? We’ll see.

Gone Apeshit Recording

A while ago I started making a game which had the working title Beasties. It had some weird looking monsters in it. As I wanted to practise some sculpting in Blender, I created one of these monsters in 3D.

The original sketch

The original sketch

Render of the sculpt

Render of the sculpt

Altough I failed completing any of the challenges, it didn’t held me from participating in the 27th Ludum Dare. As you probably have noticed, I was pretty proud of the result. If you haven’t seen it yet, go check out my post about Catch A Train.

Besides some relaxing, that was basically my summer vacation. At the moment I’m one week into the last year of my current education doing a minor about game design and development. I’m working with a great team on really cool game. I’ll keep you posted!